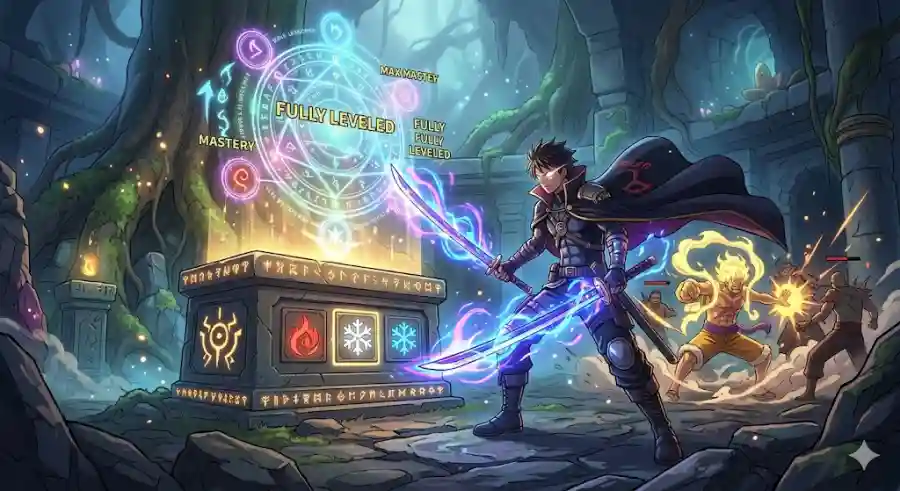
Anime Apocalypse Solo Boss Best Styles, Damage Builds, AoE Survival
This complete Anime Apocalypse solo boss guide breaks down everything you need to know, including the best character styles, Rebirth farming methods, combat mechanics, damage optimization, AoE survival tactics, and the smartest strategies for farming rewards efficiently.
If you’re ready to stop getting wiped and finally claim those rare boss drops, this guide will help you do it.
Main Highlights
What You Need to Beat the Final Boss Solo
- Reach high Rebirth levels before attempting serious boss farming
- Use high-DPS styles like Ultra Instinct Goku or Gojo
- Learn boss attack telegraphs and AoE timing
- Focus on mobility just as much as damage
- Use hit-and-run “kiting” tactics instead of reckless aggression
- Farm Survival Mode efficiently for faster progression
- Prioritize trait rerolls if your damage feels weak
- Stay patient during longer solo runs
Why the Final Boss Is So Difficult in Anime Apocalypse
One of the biggest reasons players struggle against the final boss is because the game suddenly shifts from hack-and-slash chaos into a mechanically demanding raid encounter.
Earlier content allows room for mistakes. You can tank hits, spam abilities, and rely on raw stats to push through. The final boss doesn’t work that way.
The fight revolves around three major challenges:
Massive Health Pools
The final boss typically carries around 50,000 HP or more depending on scaling and update balancing. That’s an enormous amount of health for solo players to chew through.
If your build lacks proper optimization, the battle drags on far too long. Longer fights naturally increase the odds of getting clipped by AoE attacks or movement mistakes.
Devastating AoE Attacks
AoE attacks are the true run killers.
The boss frequently launches large-area abilities marked by red warning indicators across the arena floor. These attacks hit incredibly hard and often punish greedy players trying to squeeze in extra damage.
In solo runs, surviving matters more than maximizing every combo string.
Constant Aggro Pressure
When you’re alone, the boss focuses entirely on you.
There’s no teammate to split aggro or create breathing room. Every dash attack, melee combo, and ranged strike is directed at your position. That makes positioning and movement absolutely critical.
Setup Phase: The Best Solo Builds
Preparation determines whether your solo attempt becomes a clean victory or a frustrating waste of time.
Before entering the raid, you need to optimize your damage output, mobility, survivability, and overall build synergy.
The Max Damage Strategy: Rebirth Overdrive
If there’s one thing experienced players agree on, it’s this:
Do not underestimate Rebirth bonuses.
Many newer players rush into endgame raids without maximizing their Rebirth levels, and the difference in damage becomes painfully obvious during the fight.
Why Rebirth Matters
Reaching Rebirth 5 provides a massive +250% damage increase.
That boost dramatically changes how quickly you can burn through the boss’s enormous health pool. Instead of struggling through a five-minute survival marathon, optimized players can shorten runs to under a minute in ideal situations.
That reduction in fight time massively improves your odds of surviving.
Fastest Way to Farm Rebirth
The most efficient method currently revolves around grinding Survival Mode repeatedly.
Best Farming Strategy
Use high-efficiency wave-clear styles such as:
- Grey Walker
- Shibuya update styles
- Fast AoE-focused characters
These builds allow you to speed through waves quickly while leveling efficiently.
Why Survival Mode Works
Reaching level 50 repeatedly through Survival Mode remains one of the fastest progression methods in Anime Apocalypse. While the grind can feel repetitive, the long-term payoff becomes obvious once you challenge the final boss.
Your increased damage shortens encounters dramatically.
And in raid fights, shorter usually means safer.
Best Character Styles for Solo Boss Fights
Not every style performs equally in solo raids. Some excel at crowd clearing but struggle against single-target bosses.
For solo bossing, you want mobility, burst damage, survivability, and reliable tracking.
Here are the strongest options right now.
Saiyan Style Goku / Ultra Instinct
The Ultra Instinct Saiyan style is widely considered one of the safest solo choices in the entire game.
Why Ultra Instinct Is So Strong
Its biggest advantage is survivability.
The style essentially gives players multiple chances during a fight. If you mistime a dodge or accidentally eat a dangerous AoE attack, Ultra Instinct mechanics can help keep you alive instead of instantly ending the run.
That safety net becomes invaluable during long encounters.
Best Use Case
- Players learning boss mechanics
- Solo grinders farming consistently
- Survivability-focused builds
The combination of mobility, recovery potential, and decent DPS makes this one of the most beginner-friendly high-tier solo styles available.
Gojo Satoru (JJK Style)
If Ultra Instinct is the safest choice, Gojo is the pure destruction option.
This style is absolutely devastating against bosses.
Why Gojo Dominates Solo DPS
Gojo’s ultimate ability deals enormous burst damage, often exceeding 12,000+ damage during a full cycle.
That allows players to delete huge portions of the boss’s health quickly.
Additional Advantages
- Excellent ranged attacks
- Strong AoE pressure
- Safe damage from distance
- Easier kiting potential
The ranged toolkit is especially important because it allows you to maintain safer positioning while still applying pressure.
In solo fights, distance often equals survival.
Sasuke and Zoro Builds
Not every player has access to mythological or top-tier premium styles yet, and that’s perfectly fine.
High-tier epic characters like Sasuke and Zoro still perform surprisingly well in solo encounters.
Why They Work
These styles offer:
- Strong single-target tracking
- Fast combo strings
- High mobility skills
- Reliable dash mechanics
The Catch
Unlike Gojo or Ultra Instinct, these builds demand cleaner execution.
You’ll need to:
- Dodge more precisely
- Manage cooldowns carefully
- Avoid overcommitting during melee combos
Still, skilled players can absolutely clear the final boss using these styles.
Understanding the Final Boss Mechanics
Learning the boss pattern is just as important as upgrading your stats.
Most final bosses in Anime Apocalypse rely on predictable but punishing attack cycles.
Once you understand the rhythm, the fight becomes much more manageable.
Watch the Boss Animations Carefully
The game heavily telegraphs major attacks.
Before unleashing devastating AoE abilities, the boss usually:
- Charges energy
- Pauses briefly
- Creates large red floor indicators
- Begins glowing or animating dramatically
These moments are your warning signs.
The Biggest Mistake Players Make
Many players see the boss charging and think:
“I can land one more combo.”
That greed kills runs constantly.
The moment you recognize an incoming AoE attack, stop attacking immediately and retreat toward the outer edges of the arena.
Do not hesitate.
Arena Positioning Matters More Than You Think
Good positioning prevents panic situations.
Best Positioning Strategy
Fight near the center of the arena whenever possible.
Why?
Because getting trapped near walls limits your escape angles during AoE phases.
If the boss corners you against the map edge, dodging becomes far more difficult.
Smart players constantly reposition to maintain open movement space.
Step-by-Step Solo Combat Strategy
Winning solo fights requires consistency more than flashy gameplay.
Here’s the safest and most effective combat rhythm.
Opening Phase
At the beginning of the fight:
- Activate mobility buffs immediately
- Use your highest-damage ultimate early
- Burst as much HP as possible before mechanics escalate
Important Warning
Do not stand still after opening combos.
Many bosses begin fights with aggressive forward dashes or gap-closing strikes.
Always stay mobile.
Mid-Fight Strategy
Once the battle settles into its normal rhythm:
- Bait melee attacks
- Dodge behind the boss
- Punish from the rear
- Reset positioning quickly
The goal is controlled aggression.
You want steady damage without exposing yourself unnecessarily.
AoE Survival Phase
This is where most solo runs fail.
When global red indicators appear:
- Stop attacking instantly
- Sprint or dash away
- Create maximum distance
- Wait for indicators to disappear fully
Never Greed During AoE
Trying to finish a combo during an AoE charge is one of the fastest ways to die.
Even highly geared players get punished for overcommitting.
Patience wins these fights.
The Kiting Method Explained
Because you are the only player in the arena, boss aggro stays locked onto you permanently.
That’s why “kiting” becomes the safest strategy.
What Is Kiting?
Kiting means:
- Attacking briefly
- Creating distance
- Re-engaging safely
- Repeating the cycle
This strategy minimizes risk while maintaining steady DPS.
Best Kiting Styles
Gojo
Gojo excels here because his ranged abilities allow continuous pressure without staying close.
You can safely chip away at the boss while dodging attacks more comfortably.
Zoro or Melee Styles
Melee builds require sharper execution.
The ideal pattern looks like this:
- Dash in
- Land a quick 3–4 hit combo
- Instantly disengage
- Reposition
- Repeat
Overextending almost always leads to punishment.
Are Solo Boss Rewards Worth the Grind?
For most players, absolutely yes.
The solo grind can feel brutal at times, especially when RNG refuses to cooperate, but the rewards are valuable enough to justify the effort.
Exclusive Style Drops
The biggest attraction is the chance to obtain exclusive boss rewards.
Rare Drop Rates
Final bosses often carry extremely low drop chances — commonly around 1%.
These rare rewards can include:
- Exclusive styles
- Unique cosmetics
- Special visual effects
- Prestige items
That low percentage keeps players grinding repeatedly.
Event Coin Farming
Even if luck doesn’t favor you, the game still rewards persistence.
Most successful runs provide event currency.
For example:
- Around 75 coins per clear
- Rare raid styles costing roughly 2,500 coins
That means consistent farming eventually guarantees progress even without lucky drops.
Battle Pass XP and Trait Rerolls
Solo boss clears also reward:
- Large chunks of Battle Pass XP
- Free trait rerolls
- Upgrade materials
- Cosmetics
Trait rerolls are especially important because strong traits can massively improve your damage output for future runs.
The better your traits become, the faster your farming efficiency grows.
Why This Solo Guide Matters for the Current Meta
Recent Anime Apocalypse updates have pushed the game further toward raid-focused progression.
That means efficient solo farming is more valuable than ever.
Not every player has a dedicated squad online at all times. Some players simply prefer solo challenges. Others want faster farming sessions without relying on matchmaking.
Understanding how to optimize solo clears gives players a huge long-term advantage.
The current meta heavily rewards:
- High DPS scaling
- Efficient mobility
- Fast raid clears
- Smart positioning
- Consistent farming loops
Players who master these systems progress dramatically faster than those relying purely on brute force.
Beating the final boss in Anime Apocalypse solo isn’t just about having flashy abilities or rare characters. It’s about preparation, patience, positioning, and understanding how the fight actually works.